Sunday, 29 March 2015

Claudia & Quentin Presentation

My chosen TV series is American Horror Story: Season 1 (Murder House). I chose this as series because I am not normally into anything related to horror but really enjoyed this series. I love how the characters change every season but they use the same actor and you get to know each of them in different ways. The setting for my series is in the murder house, in Los Angeles. Described in the first episode as a 'classic LA Victorian'. Also scenes will take place in Claudia's room.

My target audience is male and female, aged 18+ but mostly female. It is appealing to them because of the relationship between Claudia and Quentin; the audience wants to be a part of it. They have a complicated relationship and therefore the audience can relate. This TV series has characters of all ages therefore all ages can relate to it. It also features different sexualities, races and disabilities.

Claudia:
My first chosen character is Claudia, she is the other daughter of the characters 'Vivien' and 'Ben'.
She will fit into the series as she she will be the other daughter of the main family in the show. She is in her early twenties, she is attractive and therefore appeals to the male audience. She is pretty and has her own sense of steal therefore could be seen as a style icon to young girls. 


Key Work: The woods:
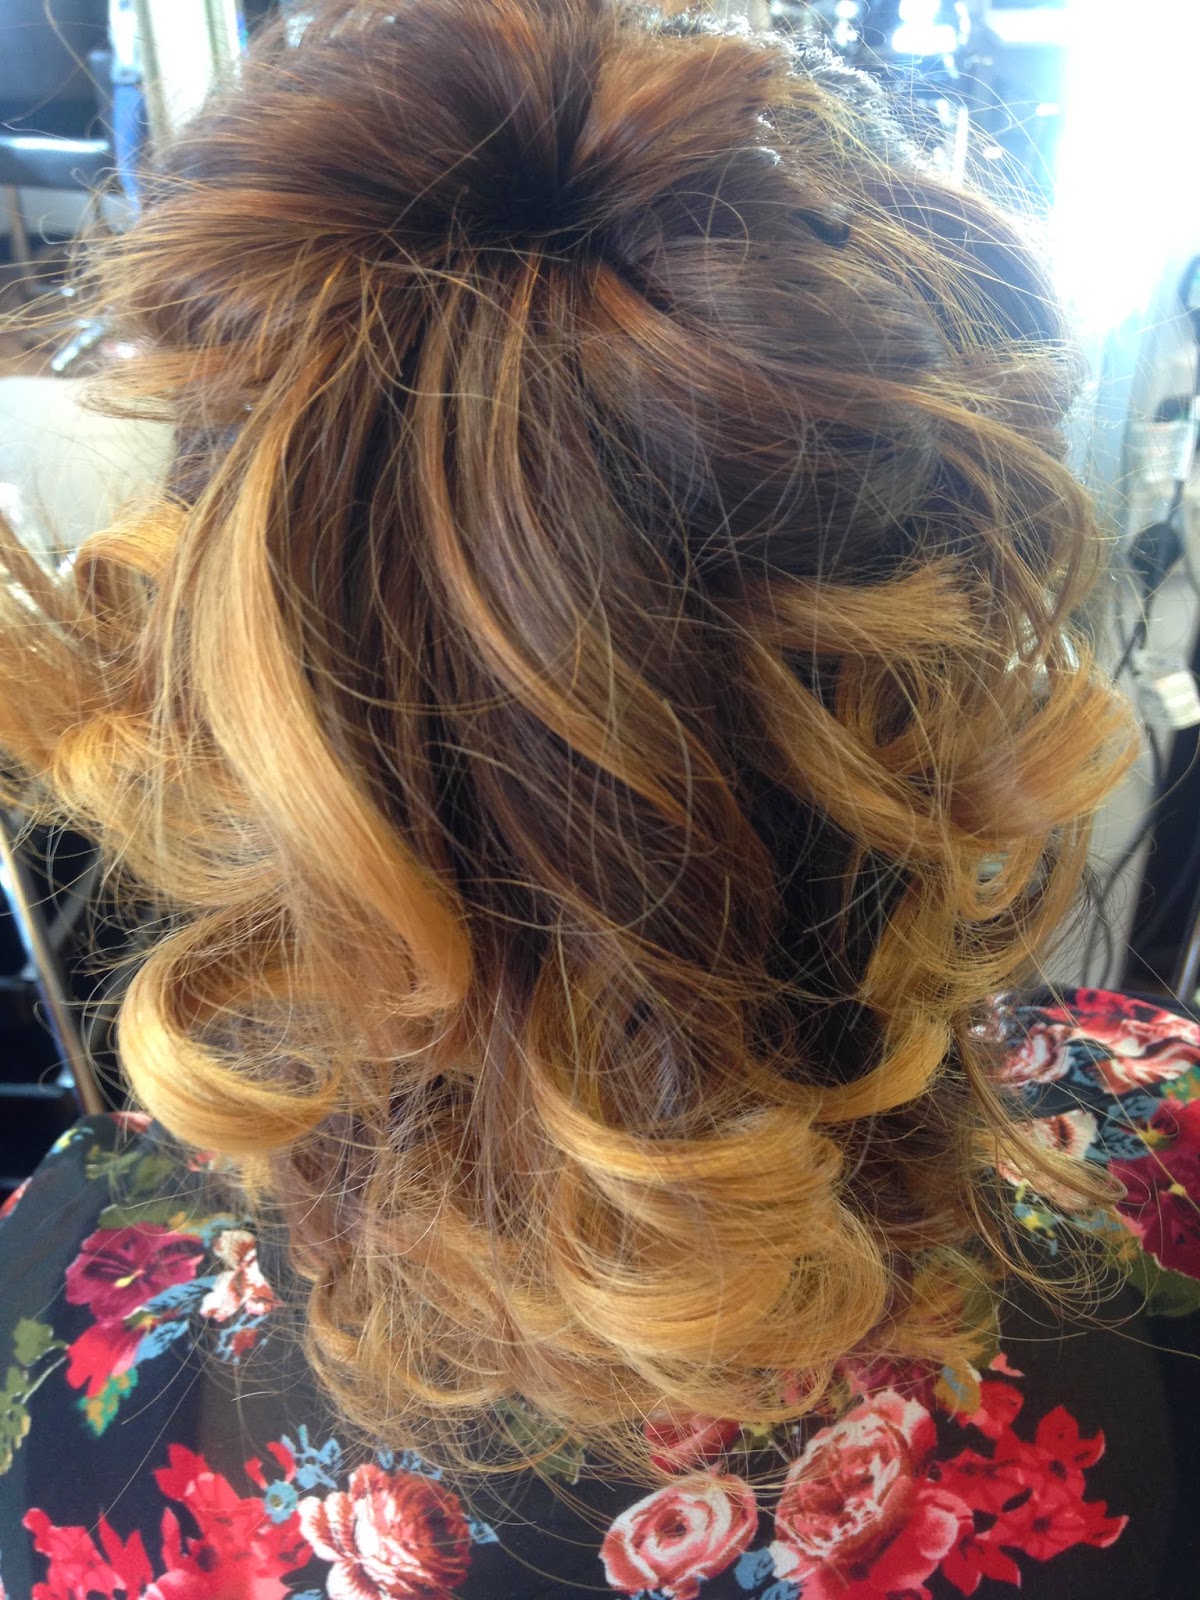
I chose this word because I felt it was the best word to represent my character. No one is quite sure what is going on in her head as she doesn't have anyone close to her and find it hard to let people in. For this I investigated how loneliness can affect women, on how they act and deal with certain situations. I see my character as when she is interacting with Quentin, her imaginary boyfriend. She is wearing a long black lace dress and has a gothic vibe about her. She has heavy dark eye makeup and her hair is down and curled. 


Colour Palette:

I chose these colours because my character is quite dark and these are the colours that I think represent her the best. 

Quentin:
My second character is Quentin, he is Claudia's imaginary boyfriend. We only see him with Claudia because only she can see him. He has a fantasy look about him, with dark makep around the eye area and a sculptured face. He wears dark clothes and is fit with dark hair. Because of his good looks this then also appeals to female audience.

Keyword: Face
I chose this because I felt it applied well to the character, with his dark features and personality he may come across as a bad guy but really he does a lot for Claudia. I chose face because I will be focusing on the facial makeup that he is wearing for my final shoot. For this I looked at various images of 'gothic horror' in males, and also in area like fashion. The scene I see this character in is with Claudia, maybe having an argument with her and him trying to calm her down. 

Colour Palette:


Saturday, 21 March 2015

Dolce & Gabbana 2010 S/S

In lesson with Fenella we were given the opportunity to create fashion based makeup look based on the horror genre. Unfortunately in lesson I didn’t get an opportunity to try the makeup as I was a model but I still wanted to try this out at home. We were given images and description to go by and then asked to create the look to our best interpretation.

Dolce & Gabbana 2010 S/S
‘Red Blooded Women’

Makeup artist Pat Mcgrath created this ‘latin’ look, she rounded the eyes with champagne eyeshadow then applied pinky beige shades up to the brows and underneath the eyes. For the lips rich and velvety texture is the key, fix the messy updo with gold hairpieces and leave some hair strands around. This women is passionate, dangerous and sexy like a wild cat. 


I really enjoyed creating this look, I felt that we haven’t really had an opportunity to create or recreate any fashion look and as this is the area I would like to go in I found this really fun. I love the bold lip stands out and even though the eye makeup is simple it still is an important aspect to the look. 

Wounds Using Moulds

Another technical skill we learnt in lesson with Sue was wounds using moulds. For this we were given a pre-made mould and had to create a wound.


Products used:
-ProsAide Adhesive
-Gelatine pre-made mould
-Witch Hazel
-Wound Filler
-Fake Blood
-Kryolan Supracolour Palette
1.       Ensure that the client isn’t allergic to any of the products you will be using
2.       Making sure the area you will be working on is clean, apply the ProsAide to the skin where you are going to apply the mould and also on the back of the mould.
3.       Making sure to blend out the edges, when it is fully dry it will be clear
4.       Then apply the mould to the skin and press firmly on the area.
5.       Use the witch hazel to blend out the edges and work the mould into the skin
6.       If the mould used doesn’t make the clients skin tone you can use foundation to get the right shade
7.       Then you can also add colour around the wound using the supra palette, wound filler and fake blood 

Sunday, 15 March 2015

Miss Havisham & Estella Assessment Evaluation

Overall I am pleased with how this term has gone and with my assessments, I felt that I tried my best on both occasions and produced work to a good standard. It was interesting for me to work on a project that isn’t fashion based and I really enjoyed it, from learning about the novel ‘Great Expectations’ to how the Victorians loved their ghost stories. I enjoyed researching about Victorian life and how different it was from any other era, making it so interesting to learn about. I found that learning about Memento Mori was the most interesting aspect, how the Victorians clung onto something of their loved ones and carried it around with them, they seemed like they respected death in a very different way to any other time period, this may have been because of the high death rate but it still caught my attention how Gothic orientated they were. I feel that I have been more successful with this term as I have made sure that I have been doing more in-depth research and therefore able to write bigger and more in detail blog posts. At first I found the design of both assessments difficult but after research and talking to some of my tutors I found that I shouldn’t make my design too intricate as the first part was based on continuity and I would have to create the same look again, therefore it would be easier to create a more simple design helping me to achieve my highest standard of work. I found that being able to choose our partners this time as well was much better, I felt that I could rely on my partner to turn up with her whole kit and we were both able to communicate to make sure we both were happy with the assessments. Overall I have really enjoyed learned about Special affects makeup as this part of the unit and feel that it will be useful for me when I’m out in the industry. 

Estella Assessment


Above are the images from my Estella assessment, I was really pleased with how my look turned out and I stuck to my design. The hair was my main concern in this part and there wasn’t any of the smaller tongs available so I had to use a bigger tong but fortunately this didn’t make much different with the final outcome. I think that the makeup is fitting to the time period it would have been set in and isn’t too over the top. I managed to complete this look with time to spare as well so I had an opportunity to make sure that everything correct to my design and to the standard I wanted it to be. 

Saturday, 14 March 2015

Practising Estella Makeup

Unfortunately there wasn’t an opportunity to practise my makeup look in lesson but I wanted to try it out so I practised it on myself. I used all the products that I wrote down in my design and felt that it helped to have my design to have something to go by. I wanted to make her look young and fresh, obviously in the Victorian times they wore little makeup therefore I wanted to show this by creating a ‘no makeup makeup look’. 

For this look I kept it simple with not using any eye makeup, a little blush and a nude colour on the lips. 

Practising Estella Hair

In class we were given the opportunity to practise our Estella looks, below is images of my hair practise. I wasn’t quite sure at first how I was going to do my Estella hair as the model I was using had short hair. At first I found it quite hard curling the hair and making sure that it went in the right places but in the end I was pleased with my result, I’m glad I had the opportunity to practise this as if I didn’t I would of found it very hard.


Friday, 13 March 2015

Estella Hair Design

I wanted the hair for my Estella assessment to have a romantic, yet modern Victorian feel to it, for this final design I firstly sectioned the hair into 3 parts, with the middle section I put it into a pony tail and curled, then pinned the curls in place to make a bun shape. I then curled the bottom section of the hair and pinned some of those curls to make a waterfall affect. With the front section I curled and then pinned behind the ears.

Estella Final Facechart

I chose this as my final facechart because I wanted to keep the makeup look as simple as possible, but I also wanted it to have a romantic feel to it. During the time that Great Expections was filmed they wouldn't of worn a lot of makeup, therefore I wanted to keep it true to the character.

Estella Facechart


Estella Facechart

Above is a practice design for my Estella assessment, I chose not to use this as my final design because I felt that during my assessment I needed to take more time on the hair, therefore wanted to keep the makeup look more simple.

Looking into Estella

 It is obvious that in Great Expectations Estella is a modern Victorian girl, throughout the film we see her style change and become more romantic as she ages. Partially her hair, towards the end of the film the curls in her hair become looser and she has a slightly off middle parting.
While looking into Estella I decided that I wanted to keep her makeup simple and make her hair more complicated, there was an option to create a look of Estella with bruises but I decided against this as I felt I wanted to make sure that I was able to create my look in the time given and to a high standard. 


Image links:
https://www.google.co.uk/search?q=estella+great+expectations+makeup+look&es_sm=93&source=lnms&tbm=isch&sa=X&ei=ZnghVf6FC8fnaqzggIgJ&ved=0CAcQ_AUoAQ&biw=1366&bih=667#imgdii=_

Thursday, 12 March 2015

Estella

In great expectations we get to know Estella as very beautiful, but cold hearted. Raised by Miss Havisham she is used to extract revenge on society and men, she brought up to torment and break men’s hearts. When she meets Pip he easily falls in love with her, like we expect many men do even though she is so cold. In the novel she is seen as cold, cynical and manipulative all these things been taught to her by Miss Havisham. Miss Havisham destroys Estella’s ability to show and express any kind of emotion apart from hate, therefore she can’t see that Pip is a better husband choice than Drummle who treats her awfully and makes her even more miserable. It is said that Dickens used Estella’s character to show that social class cannot depict on one’s happiness.
Throughout the novel we get slight glimpses of kindness in Estella’s part,  for example when she tells Pip that he should stay and way never come back because she realised and knows that she is brought and been raised to break his heart. She often tells Pip that she has no heart and towards the end Estella pushes Miss Havisham away but blames her because she has been brought up to not care and have no heart.

The beginning of the novel in set in the early/mid Victorian era therefore we see Estella with hairstyles that represent this, having a centre parting and hair up in a bun style. As the film goes on we see her style get more romantic, the curls she has in her hair become looser and her parting is slightly off centre. She wears fashionable dresses of the time and makeup minimal. 

image link:
https://www.pinterest.com/chopchophair/estella-great-expectations/


Wednesday, 11 March 2015

Comparing my 2 Final Designs


These are my 2 final looks for the Miss Havisham continuity assessment. I think that the makeup in these are alike and the aging lines are all in the same places, and it went better than I thought it would go. The areas where I think I could improve on is the hair, for example; the picture on the left has more dry shampoo (used to make the hair grey) on it than the right. Also on the right hand picture under the eyes it is slightly darker, making her look more worn and tired. Overall I think I did a good job with the continuity part of this assessment. 

Miss Havisham Assessment Part 2


Overall I am happy about how my assessment went as I tried the best I could do. I am more content with the continuity of the makeup as I feel they are the more consistent looks. This surprised me as I thought I would find doing the makeup the hardest to be the same. Doing this for our assessment was really interesting as I am looking to go into the fashion industry therefore probable won’t get to do things like this very often. Through the research I did I understand the importance of continuity and how it can affect the whole production.